A few updates on Open Camping Map

Just in time to the upcomming SOTM 2019 conference I added a few new features to Open Camping Map.

Despite the fact, that the tagging of campgrounds did not improve that much since my first announcement of Open camping Map the new features will hopefully motivate more people to help with the enhancement of campsite tagging.

So what did I add?

Generally the changes are mostly about features not rendered in Standard tile layer or German Style.

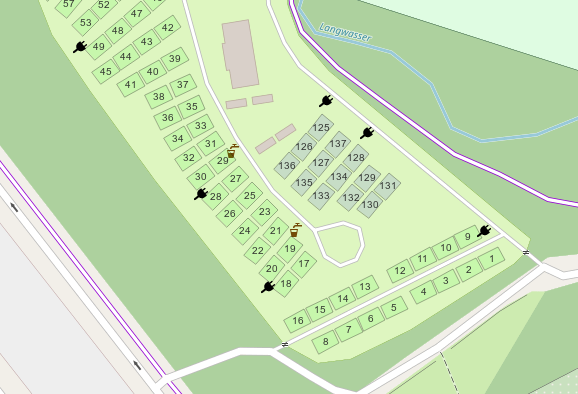
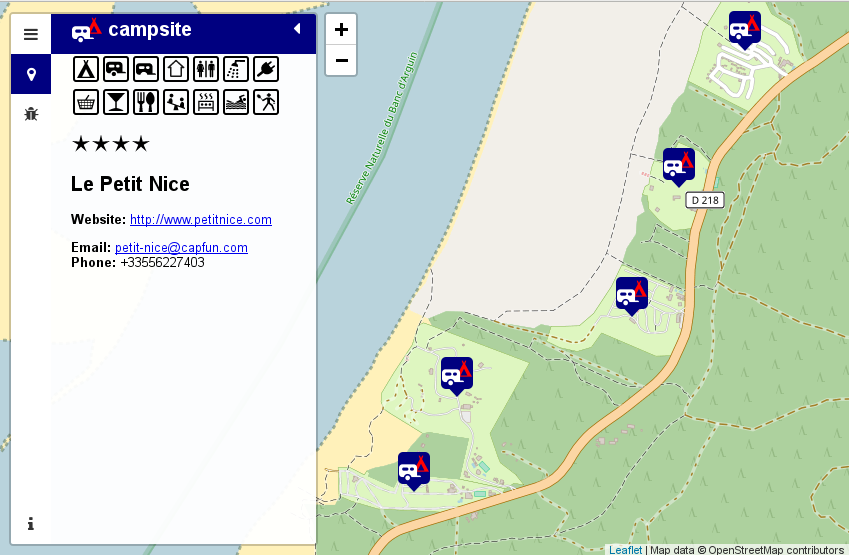
At the moment this is mostly about the rendering of tourism=camp_pitch which is rendered in different colors depending on the type of pitch (generic, for tents or permanent residents only).

In addition to this I also added a Plug Symbol for nodes tagged amenity=power_supply.

If you like to have more on the ground icons feel free to post a feature request. I will promise that I will implement it for each additional campsite where it has been added recently by the person requesting the rendering 🙂

Ein paar Gedanken zum Thema Energiewende

Angesichts, der von Greta Thunberg angestoßenen #FridaysForFuture Bewegung bekommen auch Diskussionen über die Energiewende endlich wieder den Stellenwert, den sie angesichts der Lage, in der sich die Welt befindet auch haben sollten.

Insbesondere auf Twitter kommt dann aber immer schnell die Diskussion auf man möge doch auch Kernkraft als Teil der Lösung in Richtung nachhaltigere, decarbonisierte Gesellschaften begreifen.

Ein komplexes Thema, das man sicher nicht in einem Tweet beantworten kann. Ich halte den weiteren Ausbau von Kernenergie, bzw. im Falle Deutschlands den Wiedereinstieg in deren Nutzung, für einen Irrweg und möchte hier kurz in einer Form, wie es auf Twitter nicht möglich wäre erklären warum ich das so sehe.

Nehmen wir hierzu der Einfachheit halber mal an, dass es sowohl die Probleme mit der Endlagerung radioaktiven Mülls als auch die bei heutiger Reaktorsicherheit und heutigem Ausbau etwa alle 25 Jahre stattfindenden größeren Unfälle[1] nicht gäbe.

Des weiteren möchte ich kurz für diejenigen, die den Begriff nicht kennen erklären was Grundlast bedeutet und wie diese in einem konventionellen System der Erzeugung elektrischer Energie genutzt wurde.

Zunächst zur sogenannten Grundlast.

Aufgrund der Tatsache, dass der Bedarf elektrischer Energie tages- und jahreszeitlicher Schwankungen unterliegt und elektrische Energie bisher nicht in großen Mengen speicherbar ist unterteilt man diesen Bedarf in einem klassischen, zentralistischen Energiesystem in die sogenannte Grundlast, die immer benötigt wird und in die sogenannte Spitzenlast, die nur zu bestimmten Tageszeiten benötigt wird.

Früher gab es beispielsweise in Deutschland immer zur Mittagszeit einen erhöhten Bedarf an elektrischer Energie, weil hierzulande viele elektrische Herde und Backöfen verwendet werden. Heute ist das Dank der vielen bereits installierten Photovoltaikanlagen jedoch kaum noch der Fall.

Klassisch wurden Spitzenlasten durch flexibel zuschaltbare Pumpspeicherkraftwerke und Gaskraftwerke ausgeglichen. Die Grundlast lieferten Kohlekraftwerke, Kernkraftwerke und Laufwasserkraftwerke an Flüssen.

Zur Decarbonisierung dieses Systems könnte man nun natürlich ganz klassisch planwirtschaftlich weitere Atomanlagen bauen und versuchen die Gaskraftwerke vollständig durch Pumpspeicherkraftwerke zu ersetzen. Ziel erreicht. Bleibt lediglich kurz anzumerken, dass man für ein solches System nahezu zwangsläufig in die ebenfalls umstrittene Plutoniumwirtschaft einsteigen müsste, denn auch Kernbrennstoffe sind eine endliche Resource.

Während man den Kfz-Verkehr in einem solchen System durch Umstellung auf Elektrofahrzeuge noch halbwegs stemmen könnte gibt es jedoch ein weiteres Problem, dass dieses System nur schlecht lösen kann: Den Bedarf an Wärmeenergie.

Nun zum anderen, vollständig regenerativem Energiesystem, wie es Experten sich für die künftige Energieversorgung in Deutschland vorstellen.

Der bisher noch nicht erwähnte Strom aus Solar- und Windkraftanlagen hat einen prinzipbedingten Nachteil. Während der gefürchteten sogenannten Dunkelflaute, das sind in unseren Breiten windarme Nächte am Jahresbeginn, liefern diese im schlimmsten Fall keine elektrische Energie. Da jedoch auch in diese Zeiten Energie benötigt wird gibt es also nur zwei realistische Szenarios:

Entweder man verzichtet ganz auf diese Energiequellen oder man man sieht Maßnahmen vor diese Energiequellen (temporär) vollständig zu ersetzen.

Vollständig nachhaltig lassen sich erneuerbare Energien durch Generatoren ersetzen, deren Energie (in Zeiten mit viel Wind und Sonneneinstrahlung) aus vorher erzeugten gesammelten Quellen erzeugt wird. Die technisch vielversprechendste Methode für solche Generatoren stellt die Kombination aus Elektrolyse und Gasmotoren dar. Letztere können dezentral betrieben werden, sodass deren Abwärme ebenfalls sinnvollen Zwecken zugeführt werden kann. Logischerweise ergibt sich hier aufgrund physikalischer Eigenschaften ein etwas schlechterer Wirkungsgrad als bei der direkten Nutzung elektrischer Energie, aber auch das oben beschriebene herkömmliche Energiesystem erzeugte jede Menge Abwärme.

Diese Überlegungen führen mich zu meiner Eingangs erwähnten Ablehnung von Kernkraftwerken. Diese sind nämlich prinzipbedingt teuer, zentral und in ihrer Ausgangsleistung schlecht regelbar. Wind und Solarstorm ist hingegen preisgünstig und dezentral.

Deren prinzipbedingten Nachteil, der stark schwankenden Ausgangsleistung muss man zwangsweise mit ebenfalls dezentral aufgestellten Generatoren ausgleichen. Wie das gehen kann habe ich oben beschrieben.

Ein befreundeter Professor aus dem Studiengang Erneuerbare Energien der Hochschule Karlsruhe erklärt mir, dass zur Deckung der Höchstlast in der BRD von 80GW durch Gasmotoren etwa eine Investition von 16 Milliarden Euro notwendig ist[2]. Für den aus seiner und meiner Sicht unnötigen zusätzlichen Netzausbau rechnet man derzeit ca. 80 Milliarden Euro. Zum Vergleich: Das im Bau befindliche Kernkraftwerk Olkiluoto in Finnland wird im besten Fall ca. 9 Milliarden Euro kosten und im Vollastbetrieb ca. 1,6GW an elektrischer Leistung liefern[3].

Damit an dieser Stelle keine Missverständnisse aufkommen: Zum vollständigen Umbau unseres Energiesystems auf dieses System brächte man selbstverständlich nicht nur die Investition in Gasmotoren sondern müsste auch noch die restlichen 50% an elektrischer Energie, die derzeit noch aus Kernenergie und Kohlekraftwerken stammen aus Photovoltaik und Windkraft erzeugen.

Man sollte diese Kraftwerke sogar noch deutlich weiter ausbauen, denn mit dem erzeugten Gas lässt sich dezentral ein Teil der Wärme erzeugen, die immer noch den Großteil des Energiebedarfs hierzulande ausmacht und deren vollständige nachhaltige Erzeugung leider noch immer kein Konzept vollständig löst.

Fazit: Die vollständig nachhaltige Erzeugung aller benötigten elektrischen Energie ist ohne Kernkraftwerke möglich.

Die vollständig nachhaltige Erzeugung aller benötigten Primärenergie ist deutlich schwieriger. In letzterem Fall kann die dezentrale Kombination verschiedener Ansätze helfen. Solche Ansätze reichen von besserer Wärmedämmung an Gebäuden bis zur Nutzung von Erdwärme und Anlagen zur Kraft-Wärme-Kopplung. Die oben erwähnten Gasmotoren können jedoch problemlos Teil einer solchen Infrastruktur zur Erzeugung von Wärme sein.

Ich freue mich über Kommentare und Hinweise auf sachliche Fehler zu diesem Artikel auf Twitter oder auch per Email. Ich selbst war früher ebenfalls kein Kernkraftgegner aber ich sehe wirklich nicht wie uns diese Technologie bei der Aufgabe der Dekarbonisierung unserer Energieerzeugung helfen kann.

[1] Michael Sailer erklärt in Folge 14 des Alternativlos Podcasts, dass hier Theorie und Praxis atomarer Unfälle recht gut zusammen passen.
[2] Laut Aussage eines Ingenieurs von Caterpillar Energy Solutions kostet ein Generatormotor etwa 200 Euro pro Kilowatt elektrisch. Daraus errechnen sich die genannten 16 Milliarden Euro.
[3] Quelle sind die Daten aus der Wikipedia zum derzeit in Bau befindlichen Kraftwerk Olkiluoto
Announcing Open Camping Map

When I started mapping the then newly established backcountry campsites in the Black Forest back in 2017, I discovered, that the current mapping quality of campgrounds in Openstreetmap is actually quite poor. Unfortunately this situation did not improve that much since then.

Being active in OSM for more than 10 years now, I also know that improvements will only happen, when there is an appropriate special interest map which will help motivate people to improve tagging.

So here comes Open Camping Map!

It is provided in the hope, that it will help getting mappers to improve the tagging. There is a bugs section and an edit button besides the actual info about a particular site. The Map will likely be of interest also to camping enthusiasts just looking for a site in a particular area.

Some statistics about the current (bad) state of campsites in Openstreetmap. There are about 120000 camping and caravan sites in our database. About 35000 of them do not even have a name tag. Another 39000 of them do only have a name tag and nothing else. Thus about half of the campsite data in Openstreetmap is of no further value than drawing a (sometimes named) tent on a rendered map.

Wouldn’t it be nice to use Openstreetmap to locate a suitable campsite for your next bicycle or hiking trip or just for your ordinary summer camping holiday?

I do think so, thus lets start and improve the map.

This task is even suitable for armchair mappers as most of the campsites do have a website nowadays. Probably I should also think about adding this to StreetComplete or MapRoulette challenge.

Finally here are some issues I came about while coding this map:

  • Duplicating campsites as node and way ist not a good idea. Please map the area only.
  • Please add at least some contact data to make the data useful for potential customers of a site.
  • caravan only pitches inside a campsite should not to be tagged as caravan_site.camp_site=camp_pitch would be a better option.
  • I invented a tag called permanent_camping=yes,no,only as it is common on many sites in Germany, that people rent a pitch on a seasonal basis and do not move their caravan for years. There are even sites where this is the only option.

So where will I go from here. I intend to make the map multilingual and probably add more improvement on the next Karlsruhe Hack Weekend. I will be happy about further suggestions for improvements or (even better) patches.

The backend is based on PostGIS and Imposm and the associated configuration is also available at GitHub. It is likely suitable for other POI maps. Thus feel free to contact me if you like to build one! The most easy frontend for such a map will likely be uMap.

Happy campsite mapping!

Some thoughts about localization of Openstreetmap based maps

Following this tweet about a request of localized maps on osm.org I would like to share some thoughts on this topic.

My first versions of the localization code used in German style dates back to 2012. Back then I had the exact same problem as Laurence using OSM based maps in regions of the world where Latin script is not the norm and thus I started developing the localization code for German style.

Fortunately I was able to improve this code in December 2015 as part of a research project during my day job.

I also gave some talks about it in 2016 at FOSSGIS and FOSS4G conferences.
Recordings and slides of these talks are available at the l10n wiki.

Map localization seems to be mostly unprecedented in traditional GIS applications as before Openstreetmap there was no such thing as a global dataset of geographical data.

Contrary to my initial thought doing localization „good enough“ is not an easy task and I learned a lot of stuff about writing systems that in fact I not even wanted to know.

What I intend to share here is basically the dos and don’ts of map localization.

Currently my code is implemented mostly as PostgreSQL shared procedures, which was a good idea back in 2012 when rendering almost always involved PostgreSQL/PostGIS at some stage anyway. This will likely change in a vector tile only tool chain used in future. To take this into account in the meantime I also have a proof of concept implementation written in python.

So what is the current state of affairs?

Basically there are two functions which will output either a localized street name or place name using an associative array of tags and a geometry object as input. In the output street names are separated by „-“ while place names are usually two-line strings. Additionally street names are abbreviated whenever possible (if I know how to do this in a particular language). Feel free to send patches if you language does not contain abbreviations yet!

Initialy I used to put the localized name in parenthesis, but this is not a very good idea for various reasons. First of all which one would be the correct name to put in parenthesis? And even more important, what would one do in the case of scripts like arabic or hebrew? So I finaly got rid of the parenthesis altogether.

What else does the code in which way and whats the rationale behind it?

There are various regions of the world with more than one official language. In those regions the generic name tag will usually contain both names which will just make sense if only this tag is rendered like osm carto does.

So what to do in those cases?

Well if the desired target language name is part of the generic name tag just use this one and avoid duplicates at any cost! As an example lets take Bolzano/Bozen in the autonomous province South Tyrol. Official languages there are Italian and German thus the generic name tag will be „Bolzano – Bozen“. Doing some search magic in various name tags we will end up using „Bolzano\nBozen“ in German localization and using „Bolzano – Bozen“ unaltered in English localization because there is no name:en tag.

But what to do if name contains non latin scripts?

The main rationale behind my whole code is that the mapper is always right and that automatic transcription should be only used as a last resort.

This said please do not tag transcriptions as localized names in any case because they will be redundant at best and plain wrong at worst. This is a job that computers should be able to do better. Also do never map automated transcriptions.

Transcriptions might be mapped in cases when they are printed on an official place-name sign. Please use the appropriate tag like name:jp_rm or name:ko-Latn in this case and not something like name:en or name:de.


(Image ©Heinrich Damm Wikimedia Commons CC BY-SA 3.0)

Correct tagging (IMO) should be:
name=ถนนเยาวราช
name:th=ถนนเยาวราช
name:th-Latn=thanon yaoverat
name:en=CHINA TOWN

So a few final words to transcription and the code currently in use. Please keep in mind that transcription is always done as a last resort only in case when there are no suitable name-tags on the object.

Some of the readers may already know the difference between transcription and transliteration. Nevertheless some may not so I will explain it. While transliteration is fully reversible transcription might not always be. So in case of rendered maps transcription is likely what we want to have because we do not care about a reversible algorithm in this case.

First I started with a rather naive approach. I just used the Any-Latin transliteration code from libicu. Unfortunately this was not a very good idea in a couple of cases thus I went for a little bit more sophisticated approach.

So here is how the current code performs transcription:

  1. Call a function to get the country where the object is located at
    (This function is actually based on a database table from nominatim)
  2. If the country in question is one with a country specific transcription algorithm go for this one and use libicu otherwise.

Currently in Japan kakasi is used instead of libicu in order to avoid chinese transcriptions and in Thailand some python code is used because libicu uses a rarely used ISO standard transliteration instead of the more common Royal Thai General System of Transcription (RTGS).

There are still a couple of other issues. The most notable one is likely the fact, that transcription of arabic is far from perfect as vowels are usually not part of names in this case. Furthermore transcription based on pronunciation is difficult as arabic script is used for very different languages.

So where to go from here?

Having localized rendering on osm.org for every requested language is unrealistic using the current technology as any additional language will double the effort of map rendering. Although my current code might even produce some strange results when non-latin output languages are selected.

This said it would be very easy to setup a tile-server with localized rendering in any target language using Latin script. For this purpose you might not even need to use the German Mapnik style as I even maintain a localized version of vanilla OSM Carto style.

Actually I have a Tileserver running this code with English localization at my workplace.

So as for a map with English localization http://www.openstreetmap.us/ or
http://www.openstreetmap.co.uk would be the right place to host such a map.

So why not implementing this on osm.org? I suppose that this should be done as part of the transition to vector tiles whenever this will happen. As the back-end technology of the vector-tiles server is not yet known I can not tell how suitable my code would be for this case. Likely it might need to be rewritten in C++ for this purpose. As I already wrote, I have a proof of concept implementation written in python which can be used to localize osm/pbf files.

A sshd on port 22 hack for Termux on Android

I have always been somewhat skeptic, when it comes to Android. While it is based on the Linux Kernel the Userland is far from the average GNU/Linux system where geeks like me are familiar with for many years now.

I have yet to find some documentation about the way SELinux, the Linux kernel firewall and policy routing are used in Android. The only thing I know about this stuff from digging at the console so far is that they are indeed used.

This is where Termux comes into play. Termux is a console Application which features most of the familiar GNU userland utilities.

There is even an Openssh based sshd for login from a remote machine which is quite handy for console work and file-transfer (e.g. using sshfs).

Unfortunately Android uses a somewhat strange system for isolating applications from each other based on unix user-accounts. Thus, in contrast to our familiar desktop GNU/Linux systems it is not possible for a Termux shell to access data from other applications by default.

This mechanism has two major impacts on our ssh daemon:

  • it does neither make sense to select the desired user on login nor is it possible to switch users for a sshd run by the Termux user anyway
  • ssh (running with the termux userid) will be unable to bind to port 22

For both of those issues it would be nice to have a workaround. I needed to have ssh on port 22 because of a firewall limitation of the eduroam network where my phone is connected to most of the time.

To work around the second issue some kind of sudo mechanism would be needed. For a rooted phone or (even better) a free firmware like LineageOS, which I would recommend tu use, Termux provides a package called tsu which does exactly this.

Back to the sshd on port 22 hack. First I tried to enable file based capabilities (CAP_NET_BIND_SERVICE) on the sshd binary to be able to directly select 22 as the port to bind to. Unfortunately this failed to work likely because of some default SELinux settings I did not understand.

Thus I decided to go for an iptables based approach. Fortunately at least LineageOS does provide an iptables binary.

So here is my runssh script which will run sshd and redirect port 22 to port 8022 (the default Termux ssh port).

#!/data/data/com.termux/files/usr/bin/bash

if [ "$UID" != "0" ]; then
  sshd
  tsu -a -e -c $0
  exit 0
fi

# we are supposed to be root here
# and are able to call iptables
if ! /system/bin/iptables -L PREROUTING -t nat -n |grep -q 8022; then
  echo "setting up redirect form port 22 to 8022"
  /system/bin/iptables -t nat -A PREROUTING -p tcp --dport 22 -j REDIRECT --to-port 8022
fi
Kategorien:

Ein Hoch auf Hüll!

Interessante Hopfensorten für den Selbstanbau


Hopfenanbau ist etwas, das man als Hobbybrauer relativ einfach bewerkstelligen kann. Man benötigt lediglich ein Stück Erde, ein paar Drähte und eine im Idealfall etwa 7m lange Aufspannmöglichkeit. Gut geeignet wäre beispielsweise die Stelle entlang des Dachkanals von Einfamilienhäusern.

Gerade bei „neumodischen Bierstilen“ mit starker Kalthopfung (Hopfenstopfen, dry hopping) kann der benötigte Hopfen ja schon erstaunlich stark ins Geld gehen. So kommt man bei einer Kalthopfung mit 6g/l und einem Preis von 5€/g Hopfen immerhin auf nicht ganz unerhelbliche 30cent pro Liter Bier.

An dieser Stelle kommt der Selbstanbau in Spiel!

Während die klassische Nutzung des eigenen Hopfens zur Bitterung des Bieres schwierig ist, weil man bei selbst angebautem Hopfen den Gehalt an α-Säure nicht kennt, steht dem Einsatz bei der Kalthopfung prinzipiell nichts entgegen.

Woher bekommt man also Hopfensorten, die besonders gut für Kalthopfung geeignet sind. Bevorzugt hätte man in diesem Fall natürlich US-Sorten wie Citra® oder Simcoe® mit fruchtigen Aromen. Dummerweise sind diese beiden Sorten proprietär und die Aufzucht ist dadurch für nicht lizenzierte Betriebe erst einmal prinzipiell verboten.

Pech also für alle diejenigen, die nicht in der Nähe der Yakima Valley AVA leben und dadurch vielleicht das Glück haben einen sprichwörtlich vom Laster gefallenen Steckling zu ergattern.

Was also tun? Dank dem halbstaatlichen Hopfenforschungszentrum Hüll gibt es seit diesem Jahr Alternativen aus deutschen Landen.

Alle Neuzüchtungen aus Hüll sind jetzt über die Firma Eickelmann, die einen Onlineshop für Hopfenflanzen betreibt, zu beziehen. Konkret sind das die Sorten Ariana, Callista, Hallertau Blanc, Hüll Melon, Mandarina Bavaria und Polaris.

Zwar unterliegen auch diese Sorten dem Sortenschutz (siehe Anbau- und Liefervertrag), sind aber wie gesagt für den Hobbybrauer auf dem freien Markt erhältlich.

In der Praxis dürfte wohl auch kaum jemand etwas dagegen haben, wenn man daraus wiederum selbst Stecklinge der eigenen, dort erworbenen Pflanzen für den Eigenbedarf vermehrt.

Funfakt: Im Jahre 2014 wurde mir auf eine Anfrage direkt in Hüll mitgeteilt, dass man ohne Lizenz keine Stecklinge bekommen könne. Schön, dass sich das jetzt geändert hat!

Zum Schluss noch ein paar Worte zu weiteren frei verfügbaren Hopfensorten. Die beiden Hopfensorten Comet und Cascade wurden vom US Department of Agriculture gezüchtet und sind, wie alles was dort mit staatlichen Geldern finanziert wurde, lizenzfrei verfügbar.

Auch die japanische Sorte Sorachi Ace scheint inzwischen lizenzfrei erhältlich zu sein. Leider bietet die Firma Eickelmann aber derzeit keine Pflanzen dieser Sorte an.

Des weiteren sind natürlich auch noch alle bekannten deutschen Sorten erhältlich. Nett für Kalthopfung finde ich davon die Sorte Saphir.

Für Hobbybrauer als Stecklinge verfügbare „flavor Hopfen“

  • Ariana
  • Callista
  • Hallertau Blanc
  • Hüll Melon
  • Mandarina Bavaria
  • Polaris
     

  • Comet
  • Cascade
  • Sorachi Ace (schwer zu bekommen)
     

  • Saphir
  • Alle gängigen deutschen Aroma und Bittersorten

Wer weitere spannende Sorten kennt möge mir diese per Email nennen, damit ich sie zu diesem Blogpost hinzufügen kann.

Kategorien:

News from German OSM Carto style

Back in June 2017 the OpenStreetMap Carto style (which German style is based on) finaly made the change to a hstore based PostgreSQL backend (a key value store, well suited for OSM tags).

I have been using hstore in German style for many years now and went even further by eliminating all columns in the database tables which represent an individual key.

Unfortunately upstream still uses columns for the most common keys used in OSM tagging.

Especially the decision to keep name in a different column than localized names (name:* tags are kept in hstore) is not well suited for localization, one of the main features of German style.

For this reason German style still uses a slightly different database schema which can however be made fully compatible to upstream using the database views available in our Github repository.

At Karlsruhe Hack Weekend in October I also updated the l10n code to make it possible to use them with an unaltered upstream database schema as an alternative. See l10 repository on Github for details.

I still recommend using using the German style schema though.

The Github repository does also contain a l10n only branch of Openstreetmap Carto which is an exact copy of upstream with the notable exception of localized labels in any desired latin character based language.

Because of the new Lua based transformation functions that upstream uses since Carto 4.x (the hstore based branch) I had to do a database reimport on our German tileserver as well, despite the fact, that I have been using hstore ever since.

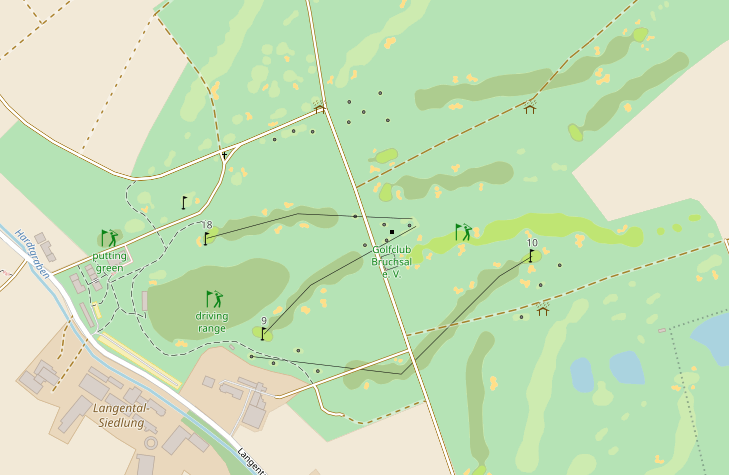
I took the chance to go for --hstore option instead of --hstore-match-only which will allow for rendering of any tag used in osm, as exotic it will be. One example of such a thing is the now active rendering of the golf tag taken from french carto style (see screenshot above).

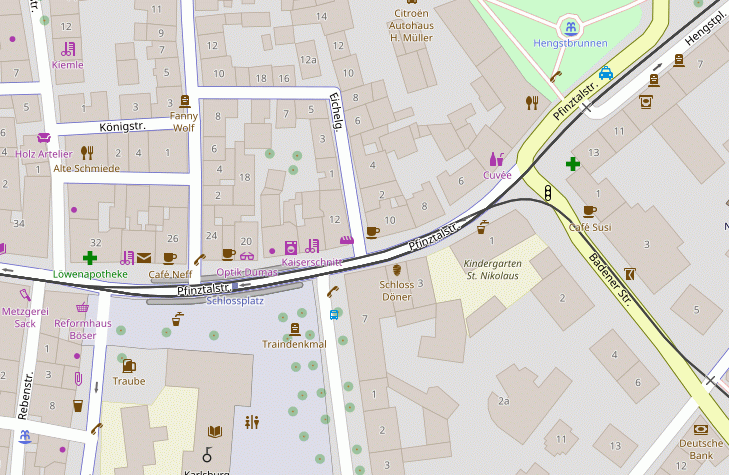
A few other changes include the adaption of road colors to be more close to the ones used in upstream and a few minor improvements like rendering of the infamous Dönertier instead of Hamburgers on Döner fast-food restaurants very common in Germany (see screenshot below).

I still hope to get one or two people to support maintenance of this fork as keeping it current with upstream will always require a little bit of work! Please contact me if you like to help.

At the time of writing http://tile.openstreetmap.de/ is in sync to the current version of upstream Carto style which is v4.4.0.

A Matrix Keypad on a Raspberry Pi done right

There are quite a few articles to be found on the Internet on how to use a matrix keyboard on a Raspberry Pi.

Surprisingly none of them seems to use the method documented here.

Instead most of them seem to use some handcrafted Raspberry Pi and python-only solution with debounce logic implemented in userland.

As with my article on Setting up a GPIO-Button “keyboard” on a Raspberry Pi this uses a device tree based approach and will not require any driver code in userland.

As with the solution above an application will be able to use this keyboard just in the same way as any other keyboard (e.g. a standard USB keyboard) connected to a computer running Linux.

So here is how to do it:

To check if the driver is available modinfo matrix-keypad should show you something like this:

pi@raspberrypi:~$ sudo modinfo matrix-keypad
alias:          platform:matrix-keypad
license:        GPL v2
description:    GPIO Driven Matrix Keypad Driver
author:         Marek Vasut <marek.vasut@gmail.com>
srcversion:     54E6656500995BD553F6CA4
alias:          of:N*T*Cgpio-matrix-keypadC*
alias:          of:N*T*Cgpio-matrix-keypad
depends:        matrix-keymap
intree:         Y
vermagic:       4.9.35+ mod_unload modversions ARMv6 p2v8 
</marek.vasut@gmail.com>

To enable the driver we need to create a device tree overlay file suitable for a given matrix keyboard.

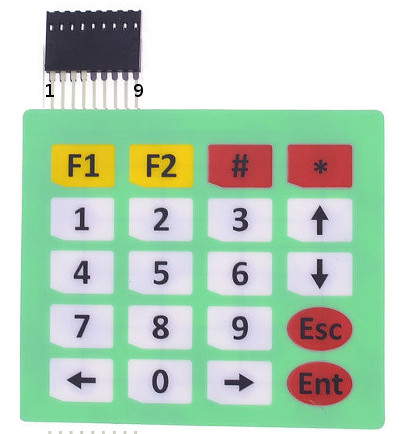
As an example I use the following device available at your favorite china shop.

4x5matrix

Here is what the corresponding device tree overlay file 4x5matrix.dts looks like:

    /dts-v1/;
    /plugin/;
    / {
           compatible = "brcm,bcm2835", "brcm,bcm2708", "brcm,bcm2709";

           fragment@0 {
              target-path = "/";
              __overlay__ {
                 keypad: MATRIX4x5 {
                    compatible = "gpio-matrix-keypad";
                    debounce-delay-ms = <10>;
                    col-scan-delay-us = <10>;
                    /* 
		       try to use GPIO only lines
                       to keep SPI and I2C usable
                    */
                    row-gpios = <&gpio 27 0    // 1
                                 &gpio 22 0    // 2
                                 &gpio 10 0    // 3
                                 &gpio 9 0>;   // 4

                    col-gpios = <&gpio 13 0    // 5
                                 &gpio 26 0    // 6
                                 &gpio 16 0    // 7
                                 &gpio 20 0    // 8
                                 &gpio 21 0>;  // 9
                    /*
                      Keycodes from /usr/include/linux/input-event-codes.h
                      converted to hex using printf '%02x\n'
                    */

                    linux,keymap = <
                                    // col0 row0 KEY_LEFT
                                    0x00000069
                                    // col0 row1 KEY_KP0
                                    0x01000052
                                    // col0 row2 KEY_RIGHT
                                    0x0200006a
                                    // col0 row3 KEY_KPENTER
                                    0x03000060
				    // col1 row0 KEY_KP7
                                    0x00010047
                                    // col1 row1 KEY_KP8
                                    0x01010048
                                    // col1 row2 KEY_KP9
                                    0x02010049
                                    // col1 row3 KEY_ESC
                                    0x03010001
                                    // col2 row0 KEY_KP4
                                    0x0002004b
                                    // col2 row1 KEY_KP5
                                    0x0102004c
                                    // col2 row2 KEY_KP6
                                    0x0202004d
                                    // col2 row3 KEY_DOWN
                                    0x0302006c
                                    // col3 row0 KEY_KP1
                                    0x0003004f
                                    // col3 row1 KEY_KP2
                                    0x01030050
                                    // col3 row2 KEY_KP3
                                    0x02030051
                                    // col3 row3 KEY_UP
                                    0x03030067
                                    // col4 row0 KEY_F1
                                    0x0004003b
                                    // col4 row1 KEY_F2
                                    0x0104003c
                                    // col4 row2 KEY_KPSLASH there is no KP_#
                                    0x02040062
                                    // col4 row3 KEY_KPASTERISK
                                    0x03040037>;

                 };
              };
           };
      };

Further documentation can be found in the file Documentation/devicetree/bindings/input/matrix-keymap.txt inside the Linux kernel source tree. Feel free to ask if it does not work for you.

Now to enable our keyboard there are only four steps left:

  1. Connect the keyboard to the GPIO lines as defined in the dts file
  2. Compile the dts file to the binary dtbo format. This is done using the device tree compiler of your kernel tree:
    ./scripts/dtc/dtc -W no-unit_address_vs_reg -I dts -O dtb -o 4x5matrix.dtbo 4x5matrix.dts
    
  3. Copy the resulting dtbo file to /boot/overlays/4x5matrix.dtbo on the Raspberry Pi
  4. Add the following to /boot/config.txt:
    dtoverlay=4x5matrix
    

Now after rebooting the Pi the lsinput command should show us a new keyboard connected to the device. You may need to install a package called input-utils first if this command ist not available on your Pi.

Here is what this looks like after pressing the Enter Key on the matrix keyboard:

pi@raspberrypi:~$ sudo -s
root@raspberrypi:~# lsinput
/dev/input/event0
   bustype : BUS_HOST
   vendor  : 0x0
   product : 0x0
   version : 0
   name    : "MATRIX4x5"
   bits ev : EV_SYN EV_KEY EV_MSC EV_REP

root@raspberrypi:~# input-events 0
/dev/input/event0
   bustype : BUS_HOST
   vendor  : 0x0
   product : 0x0
   version : 0
   name    : "MATRIX4x5"
   bits ev : EV_SYN EV_KEY EV_MSC EV_REP

waiting for events
19:56:28.727096: EV_MSC MSC_SCAN 24
19:56:28.727096: EV_KEY KEY_KPENTER (0x60) pressed
19:56:28.727096: EV_SYN code=0 value=0
19:56:28.797104: EV_MSC MSC_SCAN 24
19:56:28.797104: EV_KEY KEY_KPENTER (0x60) released
19:56:28.797104: EV_SYN code=0 value=0

Happy hacking!

Craft-Bier Freunde als Lobbyisten für Einwegdosen?

Als eines der wenigen Länder in Europa hat Deutschland ein bis heute immer noch relativ gut funktionierendes Mehrwegsystem für Getränkeflaschen.

Dessen Totengräber waren bisher ja eher nicht die kleinen Brauereien, die üblicherweise in Standardflaschen abfüllen, sondern jene, die auf Spezialflaschen umgestellt haben um ihr Markenprofil zu schärfen.

Nun ist das traditionelle Feindbild bei Bier-Nerds ja eigentlich recht klar. Kleine Brauereien gelten als Cool, Ableger der Großkonzerne eher nicht 🙂

Daher finde ich es umso erstaunlicher, dass derzeit gerade in diesem Umfeld ein bemerkenswerter Lobbyismus zu Lasten der einheitlichen Mehrwegflasche entsteht.

Dieser Artikel entsteht, weil ich mir am Wochenende in einer örtlichen Craftbeer-Bar entsprechende „Argumente“ anhören musste.

Außerdem hat die Fachzeitschrift „Meiningers CRAFT“ kürzlich einen ähnlich einseitigen Artikel (leider nicht online) veröffentlicht, den man ebenfalls nicht unwidersprochen stehen lassen sollte.

Auch die Karlsruher Bierblogger von Hoptimizer blasen ins selbe Horn.

Einer der Gründe für dieses „Dosenfreundliche“ Umfeld ist vermutlich die Tatsache, dass die USA beim Thema als Vorbild gelten. Was dort richtig ist kann ja bei uns nicht falsch sein!

Die objektive Antwort fällt aber trotzdem ziemlich eindeutig aus. Die Getränkedose ergibt aus umweltpolitischer Sicht keinen Sinn für den (räumlich relativ kleinen) deutschen Markt.

Im Export sieht das sicher anders aus, denn dort gibt es kein Mehrwegsystem und man kann schon froh sein, wenn das jeweilige Verpackungsmaterial der stofflichen Wiederverwendung zugeführt wird.

Nun noch ein paar Widerworte zu den vermeintlich guten Argumenten, die die Befürworter von Dosen für sich verbuchen.

Ich werde im folgenden die 0,33l Longneck Flasche als Vergleichsobjekt verwenden, da sich diese im deutschen „Craft-Bier“ Umfeld als Defakto-Standard durchgesetzt hat.

Nehmen wir an ich würde Bier in solchen Flaschen bei einer Brauerei in Hamburg bestellen und mir diese nach Südwestdeutschland liefern lassen. Die Flaschen müssen also rund 600km zurücklegen, bis sie hier in Karlsruhe ankommen. Das stellt innerhalb Deutschlands in etwa den worst-case dar. Im Vergleich zu den USA, wo diese Entfernung schon mal das achtfache betragen kann, nicht ganz unerheblich. Mal ganz abgesehen davon, dass es in den USA kein herstellerunabhängiges Mehrwegsystem gibt.

Fakt ist zudem, dass die Flasche aus meinem Beispiel zur erneuten Befüllung normalerweise eben gerade nicht zurück nach Hamburg muss! Viel wahrscheinlicher ist stattdessen, dass die Flasche hier in Karlsruhe z.B. mit Hoepfner Pilsener, welches die selben Flaschen verwendet, neu befüllt wird.

Mission accomplished! So sieht ein funktionierendes Mehrwegsystem aus.

Bei Bier, das hier aus dem Südwesten stammt, wie z.B. das vom Hopfenstopfer aus Bad Rappenau, ist die Ökobilanz selbstredend noch erheblich besser.

Der vermeintliche Vorteil der Getränkedose greift also nur im Vergleich zu Einwegflaschen, die schwerer sind als Dosen und dadurch bei weiten Transportwegen im Nachteil.

Für Mehrwegflaschen ist die Ökobilanz durch die Widerbefüllung selbst bei diesen Entfernungen günstiger. Details hierzu kann der geneigte Leser bei der deutschen Umwelthilfe nachlesen.

Auch das zweite Argument für die Dose, dass diese die Qualität vermeintlich länger hält kann man so nur bedingt stehen lassen.

Klar ist UV-Strahlung den Geschmack abträglich, aber davor schützt die braue Farbe der Mehrwegflaschen ebenfalls hinreichend.

Falls das so ein wichtiges Argument wäre müssten die Brauereien, die in Dosen füllen noch viel dringender über eine geschlossene Kühlkette bis zum Verbraucher nachdenken.

Ein Konzept im übrigen, welches Braufaktum AFAIK als einizger Hersteller konsequent durchzieht.

Positiv erwähnen möchte ich an dieser Stelle noch die Brooklyn Brewery, die ihr Bier in Deutschland über ihren Vertriebspartner in 0,33l Longneck Mehrwegflaschen abfüllen lässt.

Setting up a GPIO-Button „keyboard“ on a Raspberry Pi

 
Update: If you need more than a hand full of buttons you might be better of using a matrix keyboard instead.

Back in late 2013, when I wrote the first Version of a raspberry-pi based software controlling a HD44780 based 4×20 characters LCD and 4 input buttons I started querying the buttons using the generic GPIO driver included in Raspbian and its sysfs interface.

However, this has a couple of drawbacks. First of all it is hardly portable to other Linux based hardware and one has to do a lot of stuff like debouncing on the application level.

Fast forward to early 2017. Raspbian now uses a device-tree based approach for system setup and a driver called gpio-keys is readily available in its standard kernel.

However, as it is often the case in the Free Software world, the documentation of this driver is limited to some README files included in the Linux kernel and some discussions scattered all around the web.

Linux already has drivers for almost all of the common low level peripheral interfaces like I2C, SPI, OneWire, hardware PWM and generic GPIO. It is usually the better approach to use them instead of constantly re-inventing the wheel.

So here is my quick guide for setting up a „keyboard“ made up from a couple of buttons connected via GPIO ports as shown in the image.

gpio-keys

While this has currently only been tested on Raspberry Pi, it will likely also work on other Linux based boards with device tree enabled (e.g Beaglebone and others).

Keyboards in modern Linux Kernels are presented to userland as a so called input event device. To inspect them I would recommend the installation of the evtest and input-utils packages on Debian/Ubuntu based distributions. The lsinput command (run as root) shows which ones are available on a system.

So, what do we need to do to make a keyboard from our GPIO connected push-buttons?

The missing link between the gpio-keys driver and the setup of the actual GPIO ports, where the buttons are connected to, is a so called device-tree (DT) overlay.

While DT itself is a data structure for describing hardware, a DT overlay is something a user can put in place to change such a hardware description in a way which matches the actual application scenario (like buttons, buses etc. connected to the device).

So let’s build such an overlay for the four buttons shown in our schematic above.
The Documentation available at raspberrypi.org provides some clues about device tree overlays as well.

Here is the final result which works, so let’s go into the details:

    /dts-v1/;
    /plugin/;
    / {
       compatible = "brcm,bcm2835", "brcm,bcm2708", "brcm,bcm2709";
       
       fragment@0 {
          target-path = "/";
          __overlay__ {
             keypad: breadboard_keys {
                compatible = "gpio-keys";
                #address-cells = <1>;
                #size-cells = <0>;
		autorepeat;
                button@22 {
                   label = "breadboard Menu";
                   linux,code = <28>;
                   gpios = <&gpio 22 1>;
                };
                button@10 {
                   label = "breadboard down";
                   linux,code = <108>;
                   gpios = <&gpio 10 1>;
                };
                button@9 {
                   label = "breadboard up";
                   linux,code = <103>;
                   gpios = <&gpio 9 1>;
                };
                button@11 {
                   label = "breadboard enter";
                   linux,code = <14>;
                   gpios = <&gpio 11 1>;
                };
             };
          };
       };
    };

Our overlay fragment contains a keypad called breadboard_keys. This is actually the string which lsinput will show as the actual name of our input device. 22, 10, 9 and 11 are the GPIO port numbers corresponding to the green wires in our schematic.

The file gpio-keys.txt from the Linux Kernel source-tree will show us what our four button definitions need to look like. We need a label, which is arbitrary text, a linux,code which is actually a keycode as defined in /usr/include/linux/input-event-codes.h and we need a gpio definition with two options, the number of the GPIO to use and a boolean value indicating if the button is active low (1, as in our case) or active high (0).

Another thing I would like to point at is the autorepeat keyword. If given this will activate a key-press repeat behavior known from ordinary keyboards. The production of key-press-events will be repeated as long as the button is pressed.

Now how to enable this overlay on Raspberry Pi?
Very simple, once you know how 🙂

First put the above code in a file e.g. breadboard.dts.

Then compile a binary version and put it into the right place:
dtc -I dts -O dtb -o /boot/overlays/breadboard.dtbo breadboard.dts

Finally the following line must be added to /boot/config.txt:
dtoverlay=breadboard

Now we are done.

Here is how this looks like on the software side without any other input devices like keyboards connected:

root@raspberrypi:~# lsinput
/dev/input/event0
   bustype : BUS_HOST
   vendor  : 0x1
   product : 0x1
   version : 256
   name    : "breadboard_keys"
   phys    : "gpio-keys/input0"
   bits ev : EV_SYN EV_KEY EV_REP

root@raspberrypi:~# input-events 0
/dev/input/event0
   bustype : BUS_HOST
   vendor  : 0x1
   product : 0x1
   version : 256
   name    : "breadboard_keys"
   phys    : "gpio-keys/input0"
   bits ev : EV_SYN EV_KEY EV_REP

waiting for events
20:00:23.629190: EV_KEY KEY_BACKSPACE (0xe) pressed
20:00:23.629190: EV_SYN code=0 value=0
20:00:23.749163: EV_KEY KEY_BACKSPACE (0xe) released
20:00:23.749163: EV_SYN code=0 value=0
20:00:23.969176: EV_KEY KEY_DOWN (0x6c) pressed
20:00:23.969176: EV_SYN code=0 value=0
20:00:24.099151: EV_KEY KEY_DOWN (0x6c) released
20:00:24.099151: EV_SYN code=0 value=0
20:00:24.329158: EV_KEY KEY_UP (0x67) pressed
20:00:24.329158: EV_SYN code=0 value=0
20:00:24.439154: EV_KEY KEY_UP (0x67) released
20:00:24.439154: EV_SYN code=0 value=0
20:00:24.669157: EV_KEY KEY_ENTER (0x1c) pressed
20:00:24.669157: EV_SYN code=0 value=0
20:00:24.759176: EV_KEY KEY_ENTER (0x1c) released
20:00:24.759176: EV_SYN code=0 value=0
root@raspberrypi:~# grep breadboard /sys/kernel/debug/gpio
 gpio-9   (                    |breadboard up       ) in  hi    
 gpio-10  (                    |breadboard down     ) in  hi    
 gpio-11  (                    |breadboard enter    ) in  hi    
 gpio-22  (                    |breadboard Menu     ) in  hi    

Finally something which is not strictly on-topic concerning this post. There is something one should know about keyboard like input event devices like this. Pressing a button will send events to all applications normally consuming them (e.g. applications running on Linux console or X-Window system).

This might be an unwanted behavior. If so, your application software needs to issue a EVIOCGRAB ioctl after opening the input device.